HOME // DIY PICTURE MOULDING REVEAL
Guys, it’s FINALLY done! The project that has tested my limits, pushed me to learn new skills and given me more confidence in my DIY capabilities than I ever knew I would. Our first floor finally has the charming character I’ve dreamed of adding since the day we moved in!
It’s hard to believe I started this project back in July and only wrapped up Thanksgiving weekend, but the results were so worth it. I not only want to give you the before and afters, but also give you some tips, tricks and details I learned along the way to give you the confidence to tackle projects like this on your own!
First I’ll say, while I believe in each and every one of you, this project is not for the faint of heart! It definitely helps to have a knack for DIY, or at least some serious motivation to power through all of the challenges along the way. BUT, with that being said, you DON’T need any experience using a mitre saw, or woodworking. I literally had 0 when I bought this saw to do this project, and I figured it out through trial and error, test cuts and the school of youtube. (I did stare at it with intimidation for 2 months before starting though… and almost chickened out)
As I started writing a full tutorial, I realized I was recapping a lot of content that’s already out there, so I thought of something far more useful for anyone interested in taking on this project. Instead of a step by step, I categorized all of the tips and tricks a learned along the way, that I wish I had known or read before starting this project.
Before we get into all of that, let’s start with some before photos. And I’m going to throw it wayyy back, because I don’t ever actually show you the true “before” of our house when we moved in!
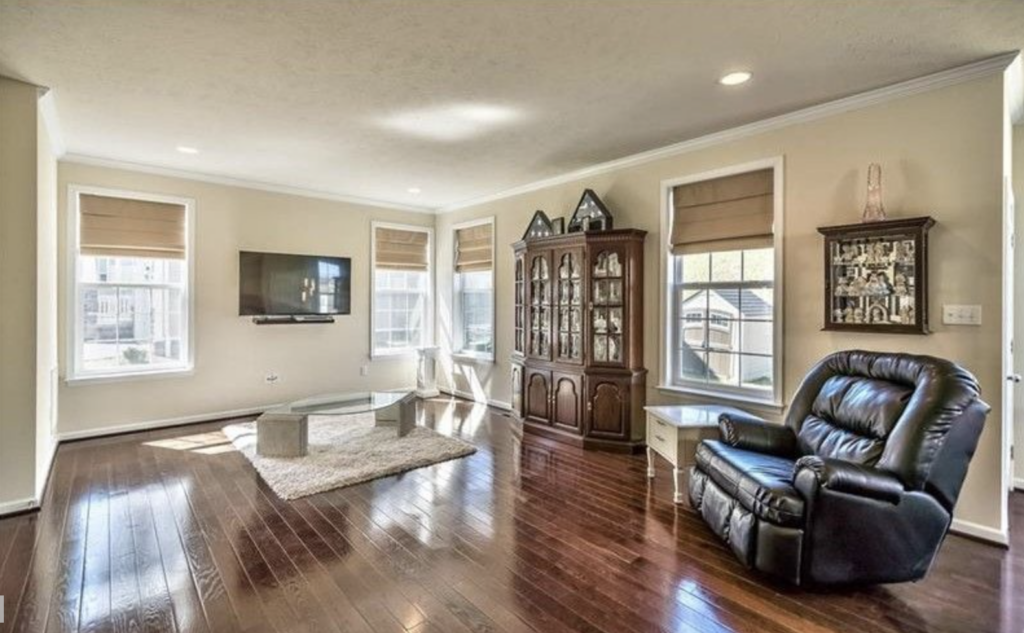

If you’re familiar with the blog, you likely know the amazing progress I’ve made here over the last three years. While I was happy with our home’s progress before the moulding, these new builder grade houses just don’t have the level of character I was after.
Over the years I’ve grown more into my style, and have started to narrow in on what I was after. I have an affinity for classicism (think French Parisian apartment, with light parkay floors, white walls, and filigree moulding around every casing, trim and light fixture and a plaster or stone fireplace) but with modern twist, and I wanted to bring a bit of that into our home with this moulding!
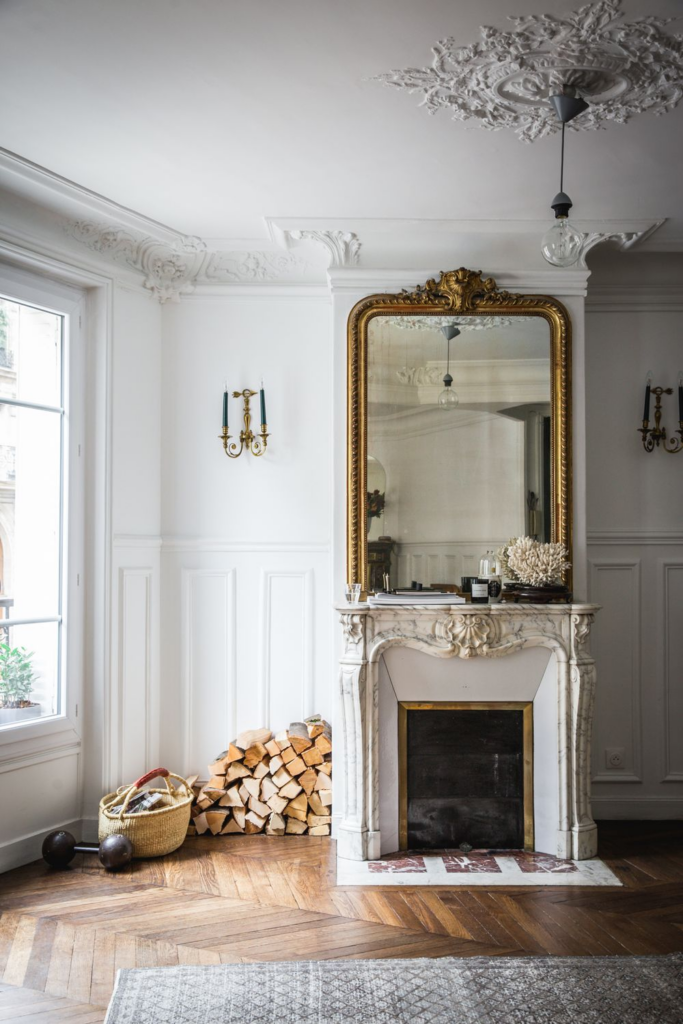
Obviously our new build will never reach this point, we’ll need to buy a whole new house to get there, but I knew I could add a little bit of bespoke elegance and charm with this moulding that would hold me over until our big Parisian adventure! (kidding 😉! But hey, anything’s possible right!?)
Tools You’ll Need
I’ll link the exact products I own for your reference:
– Mitre Saw
– Laser Level
– Painters Tape
– Safety Glasses
– Air Compressor
– Pneumatic Nail Gun
– Finishing Nails
– Level (the real MVP in this project)
– Angle Finder I had a manual one, but this is worth the extra $10
– Wood Filler
– Latex Paintable Caulking & Gun
– Paint Gun (not necessary but speeds up the process if you need to prime. This is my favorite one & you don’t need an air compressor)
– Dotted Notebook (again, not necessary, but see tip #2 under “Planning & measuring” for why I reccommend)
Alright, let’s get into all of the tips I wish I read before starting each of these steps!
PLANNING & MEASURING
1. To figure out your spacing measure ALL of your walls in relation to where any outlets, switches or anything that would cause you to work around the item. You will want all of your moulding to be top and bottom aligned throughout the room, but the width will change.
You will want to determine a good spacing between your moulding panels, ceiling trim and floor trim. In our case I installed a chair rail, so our upper & lower spacing for the top half of the moulding ended up being 8 inches in the living room.
In the hallway, we didn’t do chair rail, and the areas were much narrower, so the perfect spacing ended up being 4 inches. That allowed me to work around most outlets without any special cuts, and created a cohesive look.
It is recommended to not use more than 2 spacer sizes in one area for consistency. I personally preferred to move outlets and switches that were in my way, but this isn’t necessary.
2. Some people use blue tape and mark out all of the moulding. I felt like this was excessive and a bit of a time suck. I recommend getting a dotted notebook, and drafting drawings to scale, using the squares as a certain unit of measurement. This will help you visualize so you don’t need to tape everything off.
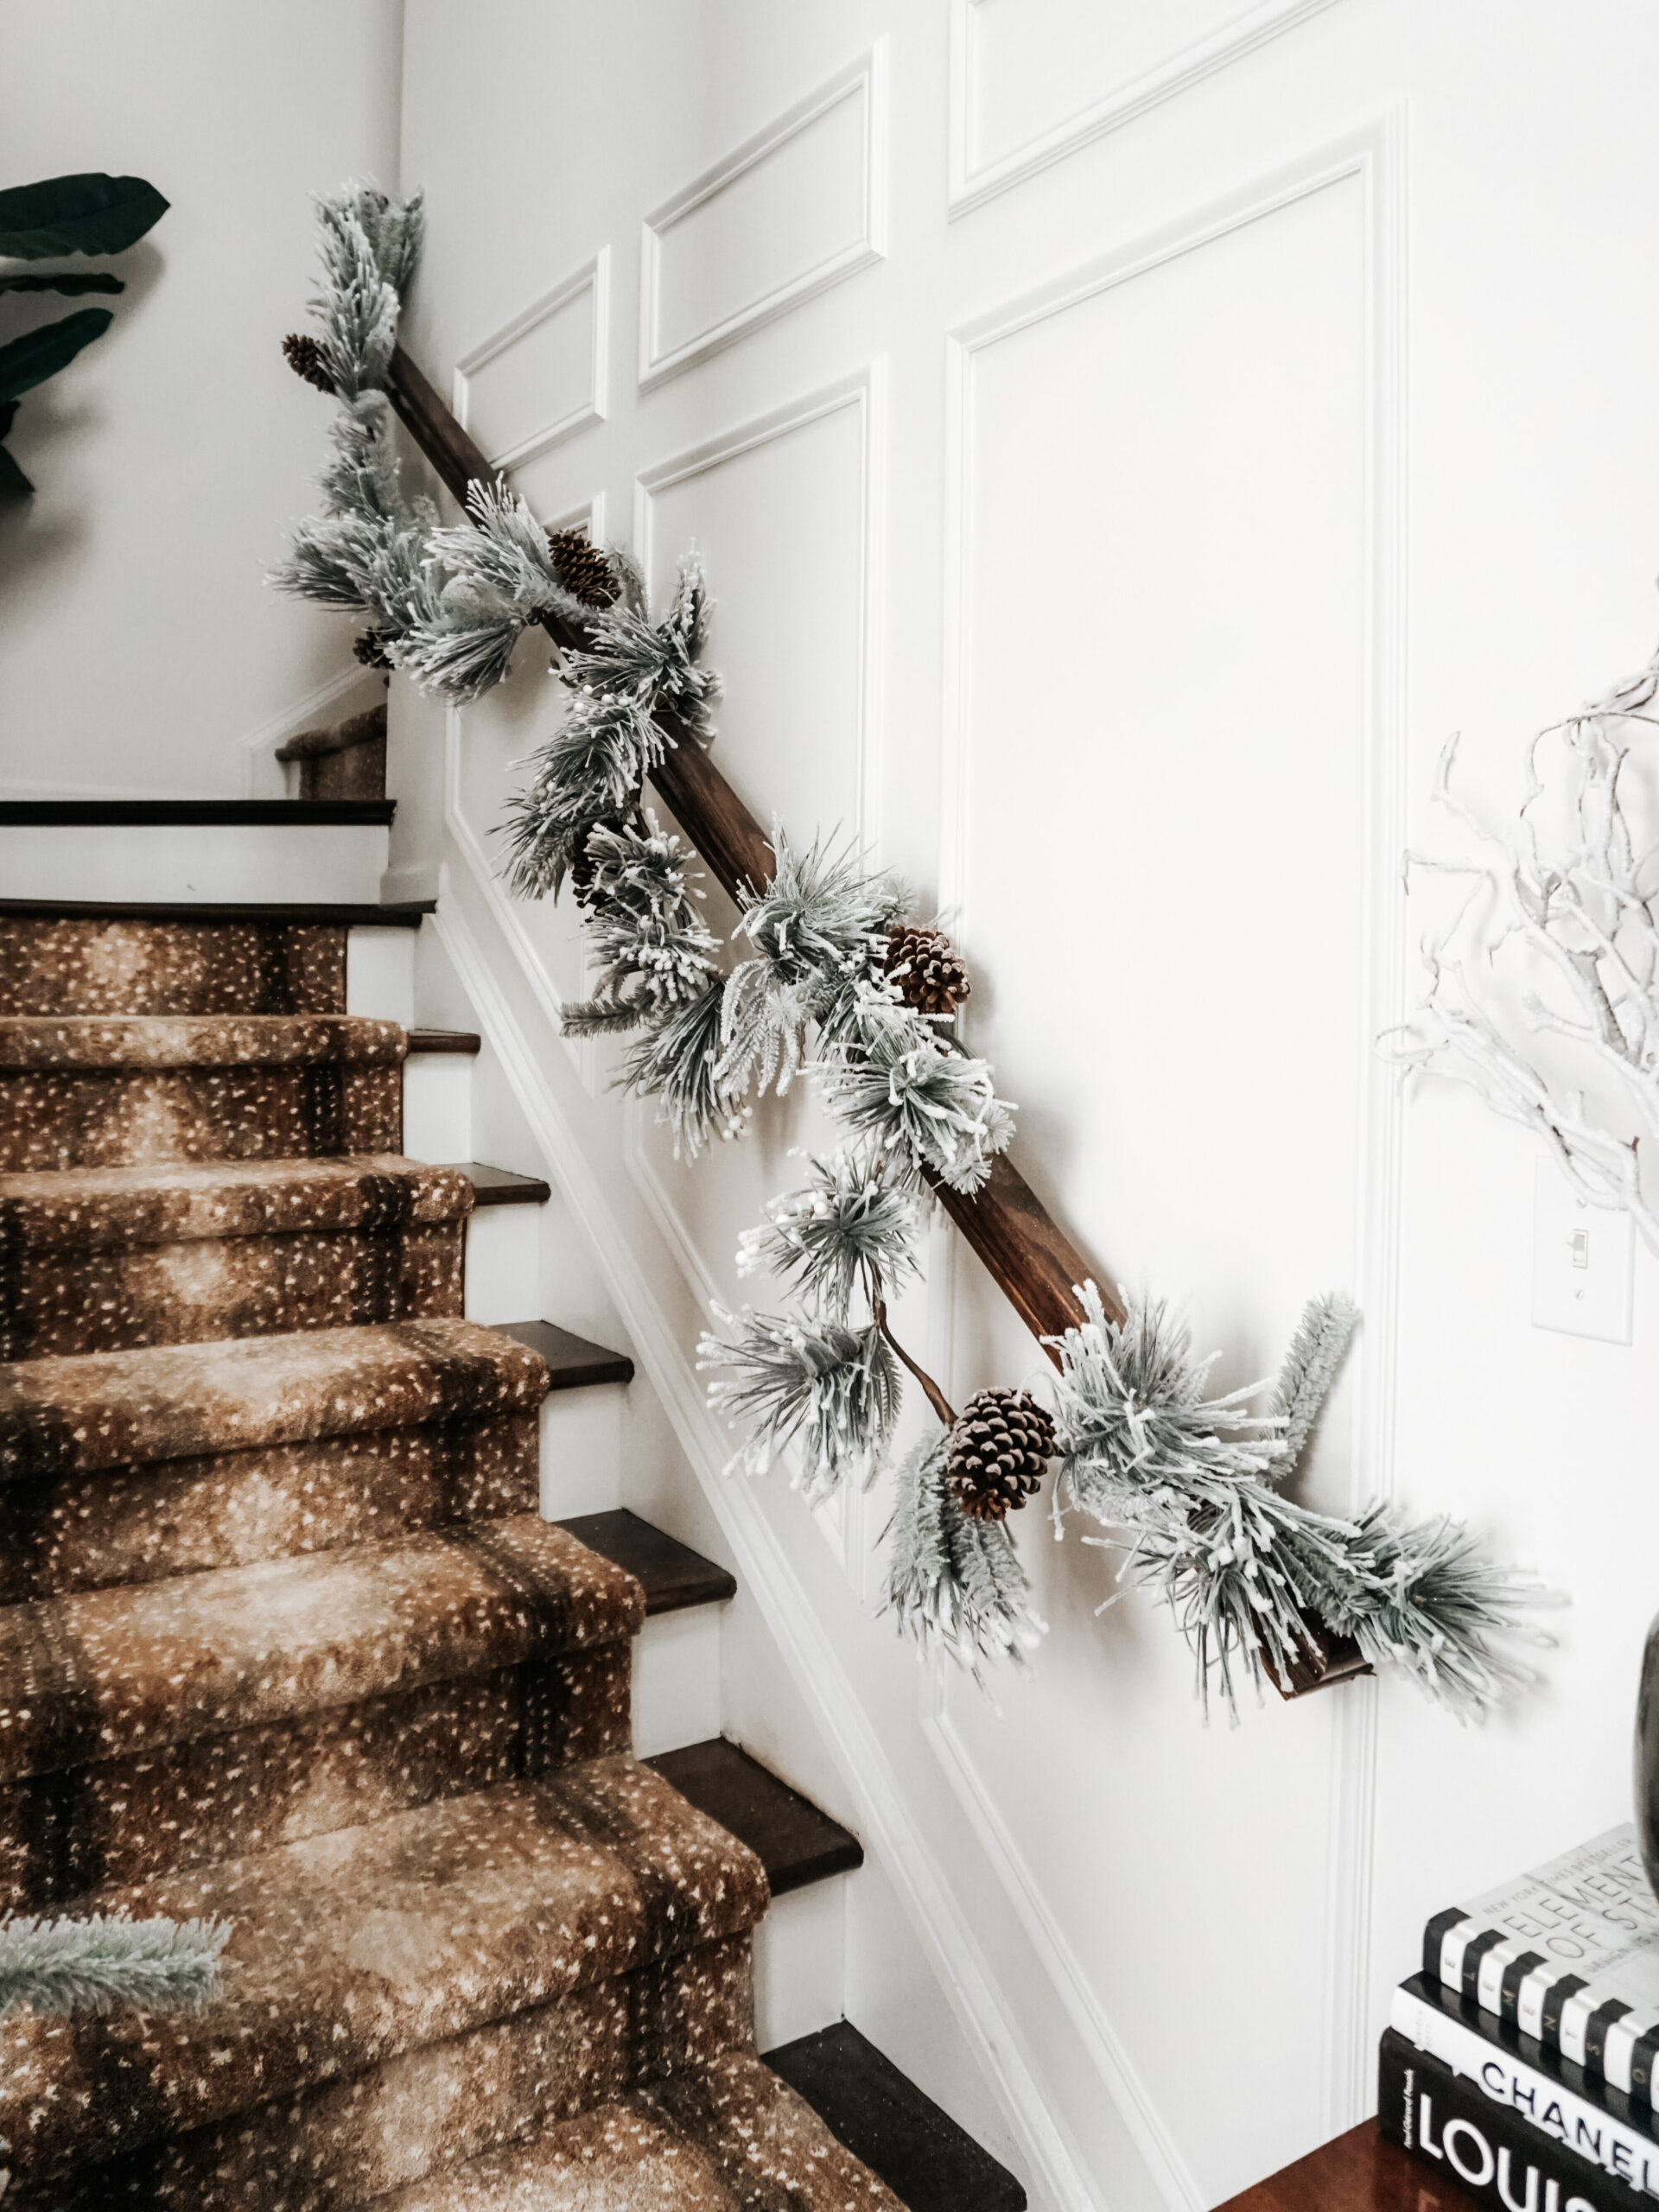
3. I suggest using architectural features in your home as guides for alignment. If you have window casings that are relatively tall, use those as the top of your moulding.
4. Inconsistent moulding spacing, size and not working within your homes features all can make this project go very wrong! Consistency is key to make this feel professional and polished!
CUTTING
1. Angles are HARD. Start with your square, 90 degree angles. This is why I started with the living room. These were all 45 degree cuts, making it a lot easier to practice and learn.
2. Cut and install your largest wall first. There are a few reasons for this… for one, you will test you ability to cut, measure and install properly. Secondly, it will give you instant gratification and keep you motivated throughout this project. You will run into hiccups, but this will help you push through!
3. Once you get the hang of it and you’re confident in your measurement, cut all of your wood at once. I repeat, cut it all at once! This will save you so much time. Bouncing back and forth, re-aquanting yourself with the saw, and re-learning what side the inside or outside is on the moulding takes up so much time and mental energy. The living room took me 4 months to finish because I bounced back and fourth. The hallway, entry and stairs took me 4 days, because I spent one of those days cutting 95% of my wood.
4. If you cut all of your wood at once, figuring out which piece goes where will slow you down. So instead, use your handy-dandy drawings with measurements, and number the pieces that are the same, and put them in piles accordingly. When you go to hang, you will look at your drawing and see you need two #5’s and two #7’s for instance. This was a GAME CHANGER for me.
5. Like I said before, angles are HARD. When in doubt, youtube, test cut, youtube, test cut. If you are dealing with acute angles, you will need a jig, this can get complicated, but youtube can teach you. I barely understood how I pulled it off, so I’m not going to attempt to teach you here!
INSTALLATION
1. You can get a finishing nail gun that doesn’t run on a compressor. If you are doing a small job, and also using glue, you can do this. I chose a pneumatic nail gun because this was a big job, and I didn’t want to fuss with glue.
2. You can use glue and finishing nails or just nails. I opted for nails only. I wanted to ensure that whomever owned the home after us wouldn’t need to go through the trouble of resurfacing the walls if they wanted to remove this. If you change your mind often, I would also opt for this option. That way you can always remove it later with minimal damage.
3. Drive the finishing nails at an angle, especially if you aren’t using glue. This will make the moulding much more secure to the wall.
4. Install the bottom piece first, then the sides (with a level) and the top you will just plop into place like a puzzle piece. Your eyes will notice more imperfections at eye level than high up, so I prefered to work my way up in case something went awry.
FINISHING
1. Guys, I’m not going to lie, this was the part that almost broke me. Not because it was hard, but because it was long, tedious, and made my fingers REALLY sore. So with that being said…
2. If you can get help with this step, TAKE IT. I did this entire project myself, but this part would have been so much better, faster and more bearable if I had someone helping. Filling the nail holes with putty was easy, filling the seams was a pain, but do-able, but caulking every inside and outside seam to perfection was a task that I will never sign up for alone again!
3. Caulking tools don’t work as well as your finger. I’m a perfectionist, and if you can get them to work for you, use them. They are about 3 dollars, in either the form of a cap (a dap cap) or a silicon square with different corner tips to smooth the caulking bead. I couldn’t achieve the look I wanted with them, and I found myself going right back to using my finger everytime.
4. If you use your finger to smooth the caulking, a wet finger is best. Keep A LOT of paper towels around, and a bowl of water. It’s and you basically waste half of the tube of caulk, no matter how small of a tip you cut. There’s no way around it.
5. Put on a tv show, podcast or music… You’re going to need it!
PAINTING
So this would be included in the finishing work, but it depends on the moulding you bought what steps you’ll need to take.
1. Buy pre-primed moulding (preferably MDF for texture). I didn’t, and priming was the second worst part. It took a while and was hard to achieve coverage with the pine moulding I chose. I did however choose pre-primed MDF chair railing, and it was a DREAM to cut, caulk and paint.
2. If you buy unprimed wood, prime it all first before cutting and installing. I bought a paint sprayer to help with this, and it took this process from 2-3 hours down to 30 minutes.
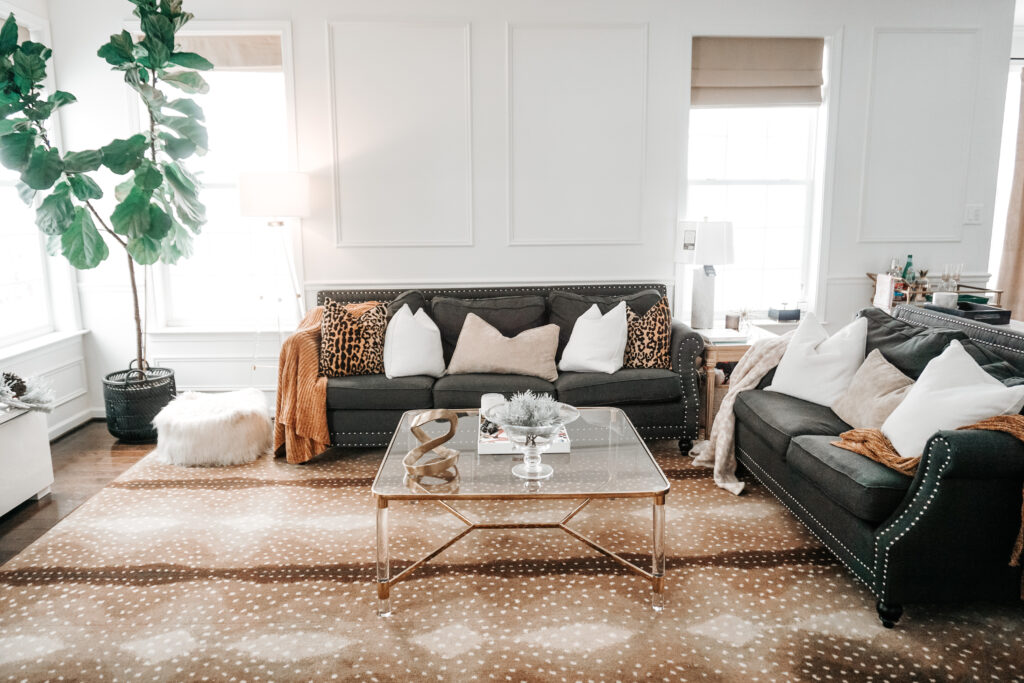
That was a lot to take in, and I’m not convinced I even covered it all, but I hope those tips help if you’re considering this project! Now for the fun part, all of the after photos!
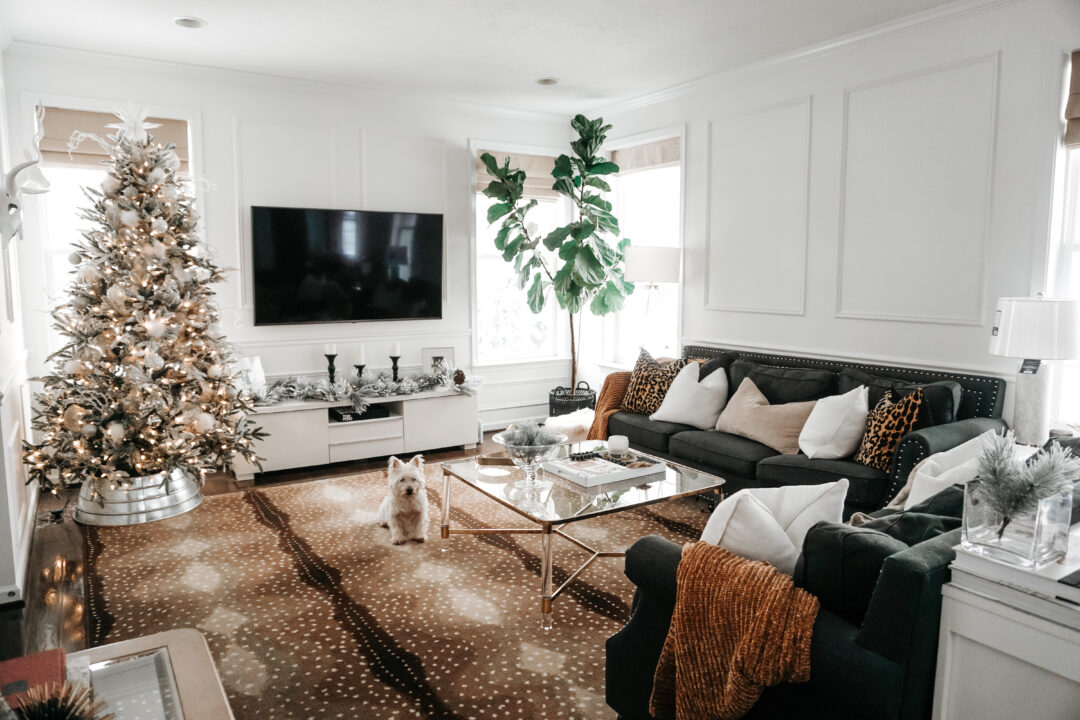
This project ended up getting finished the weekend of thanksgiving, so enjoy a christmas tour of our picture moulding project!

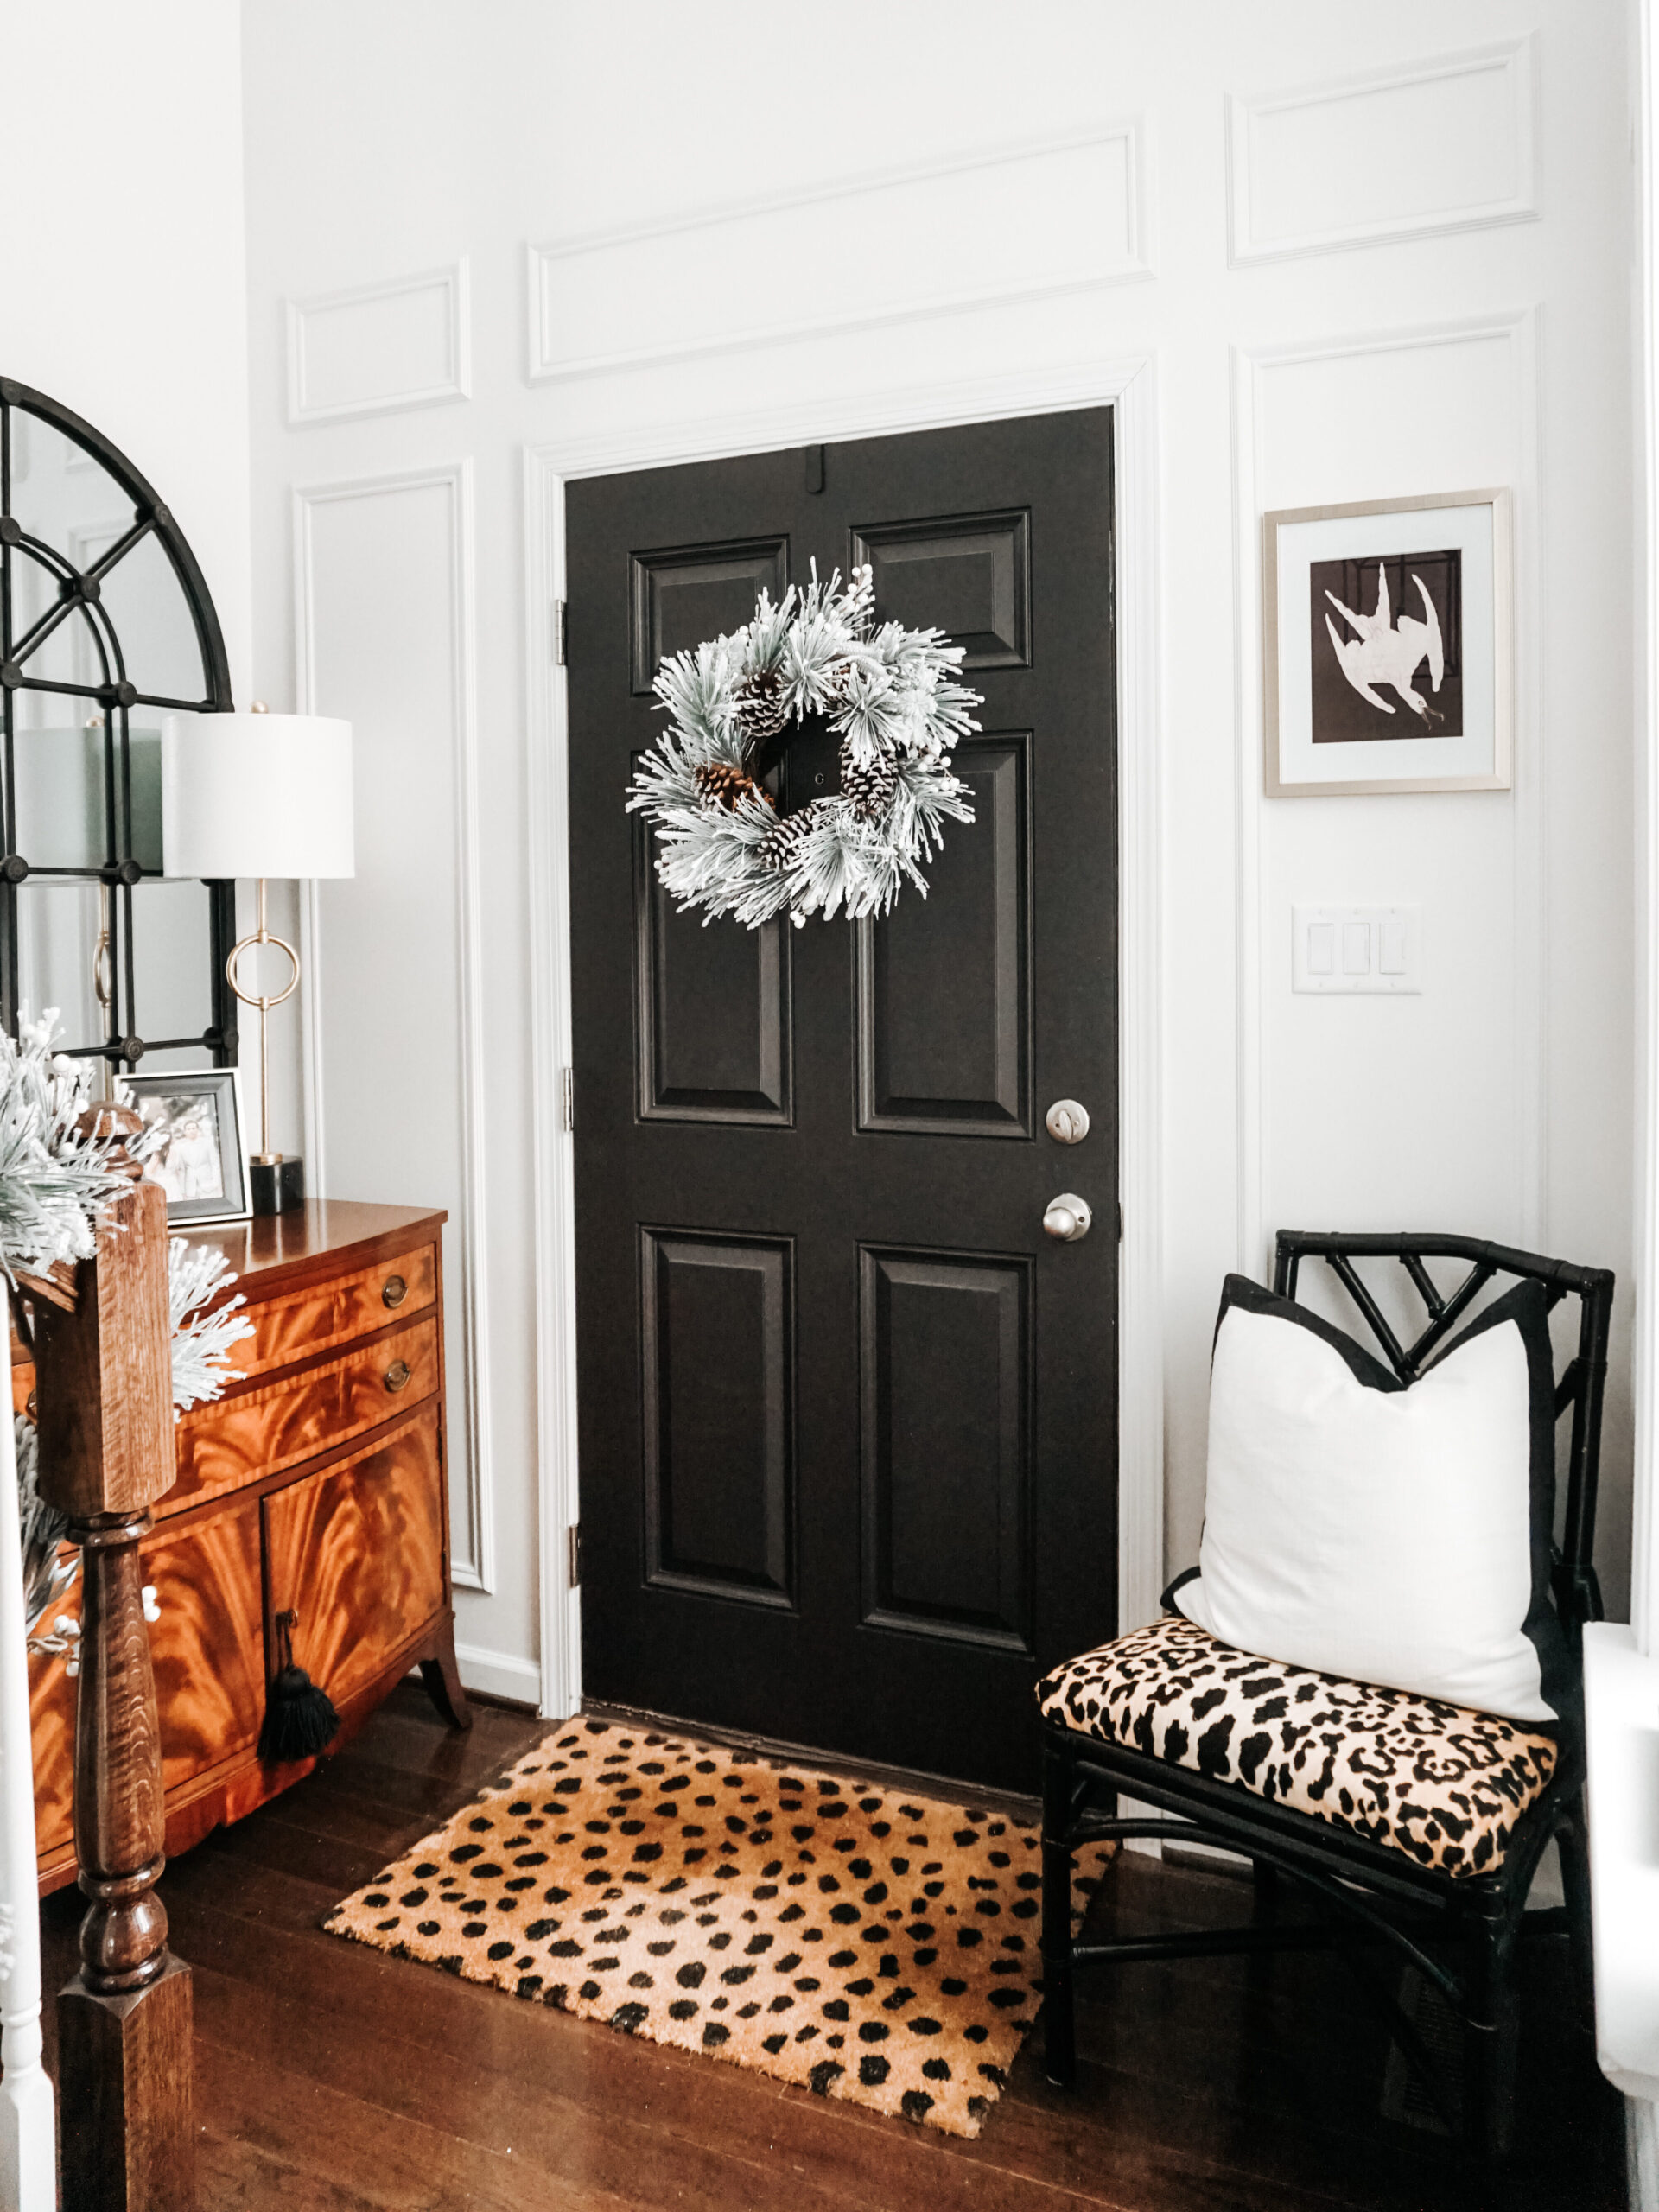
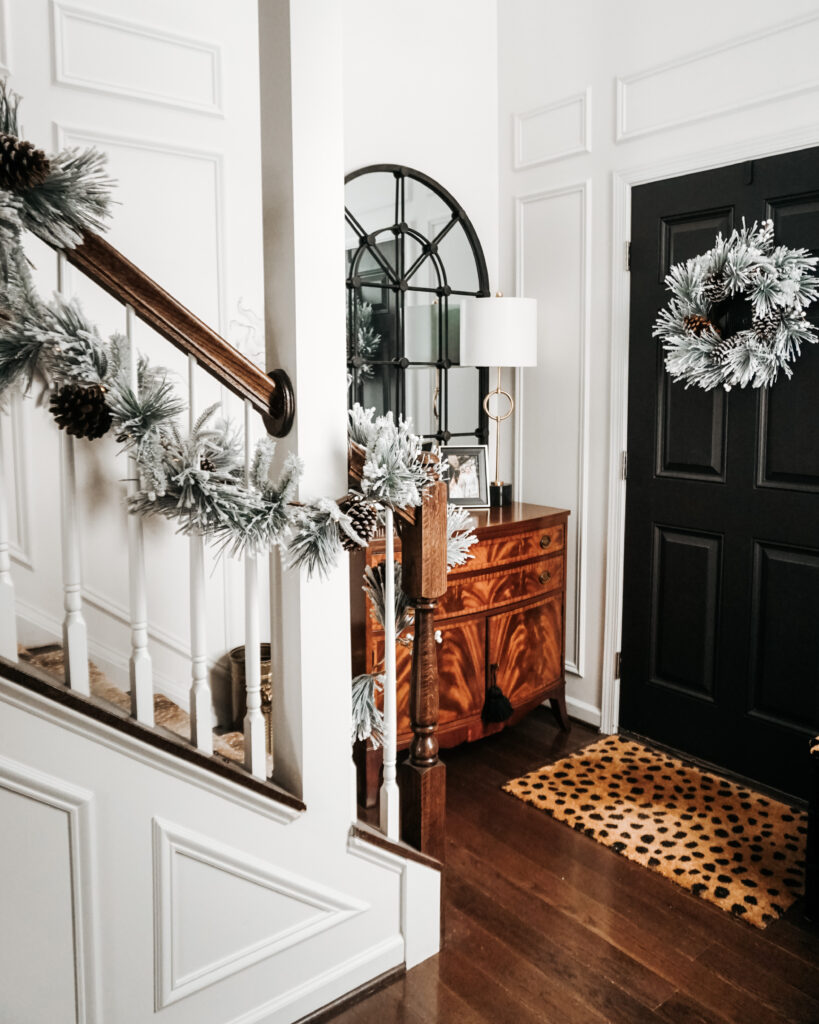
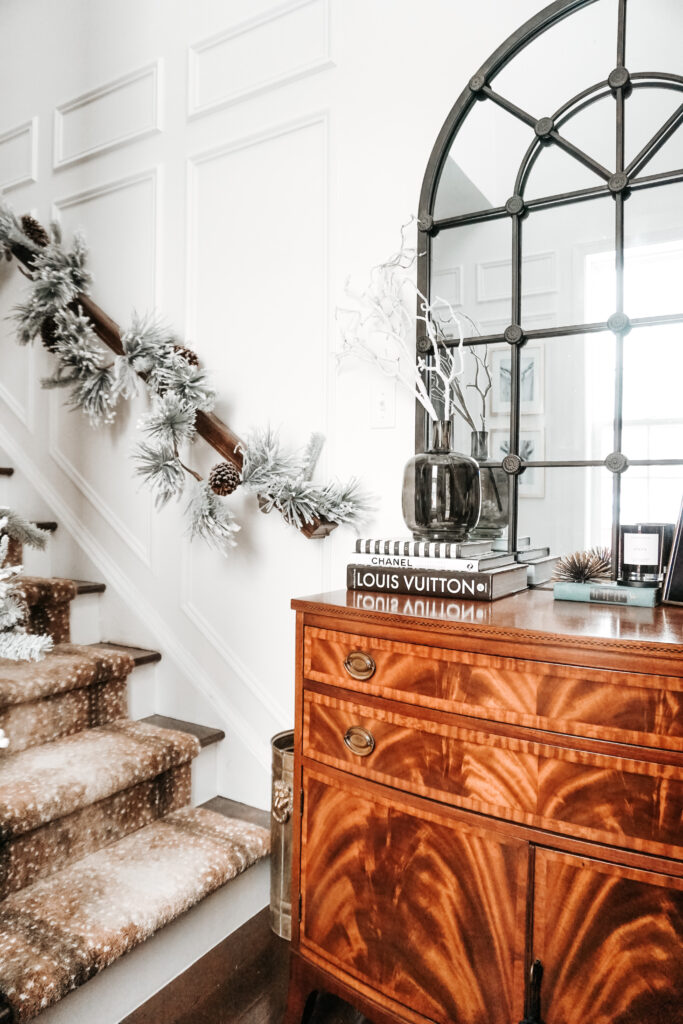
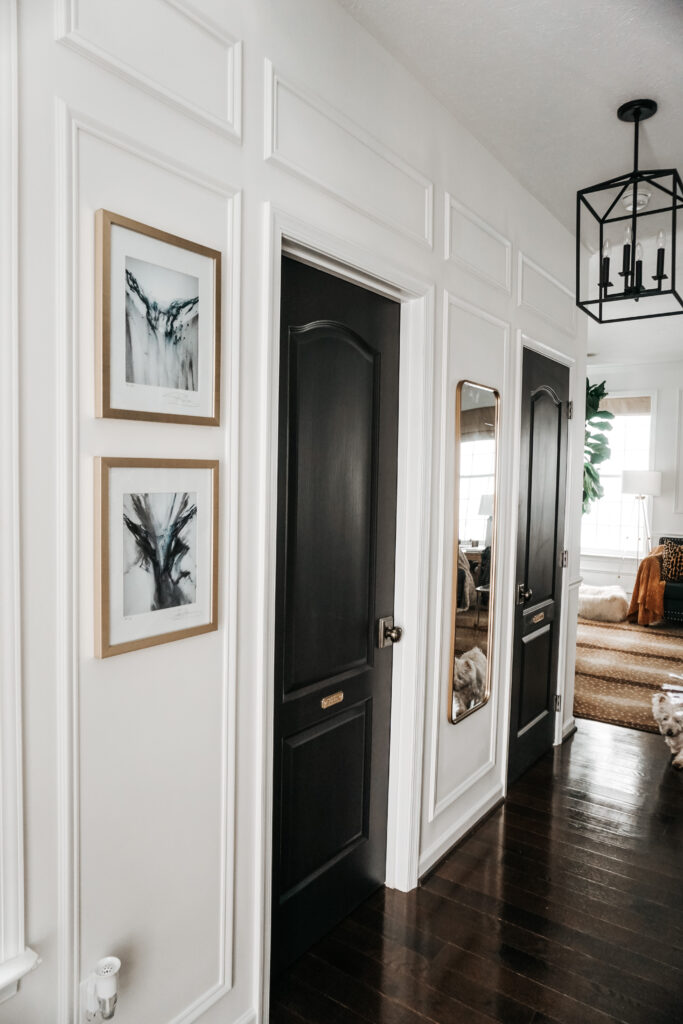
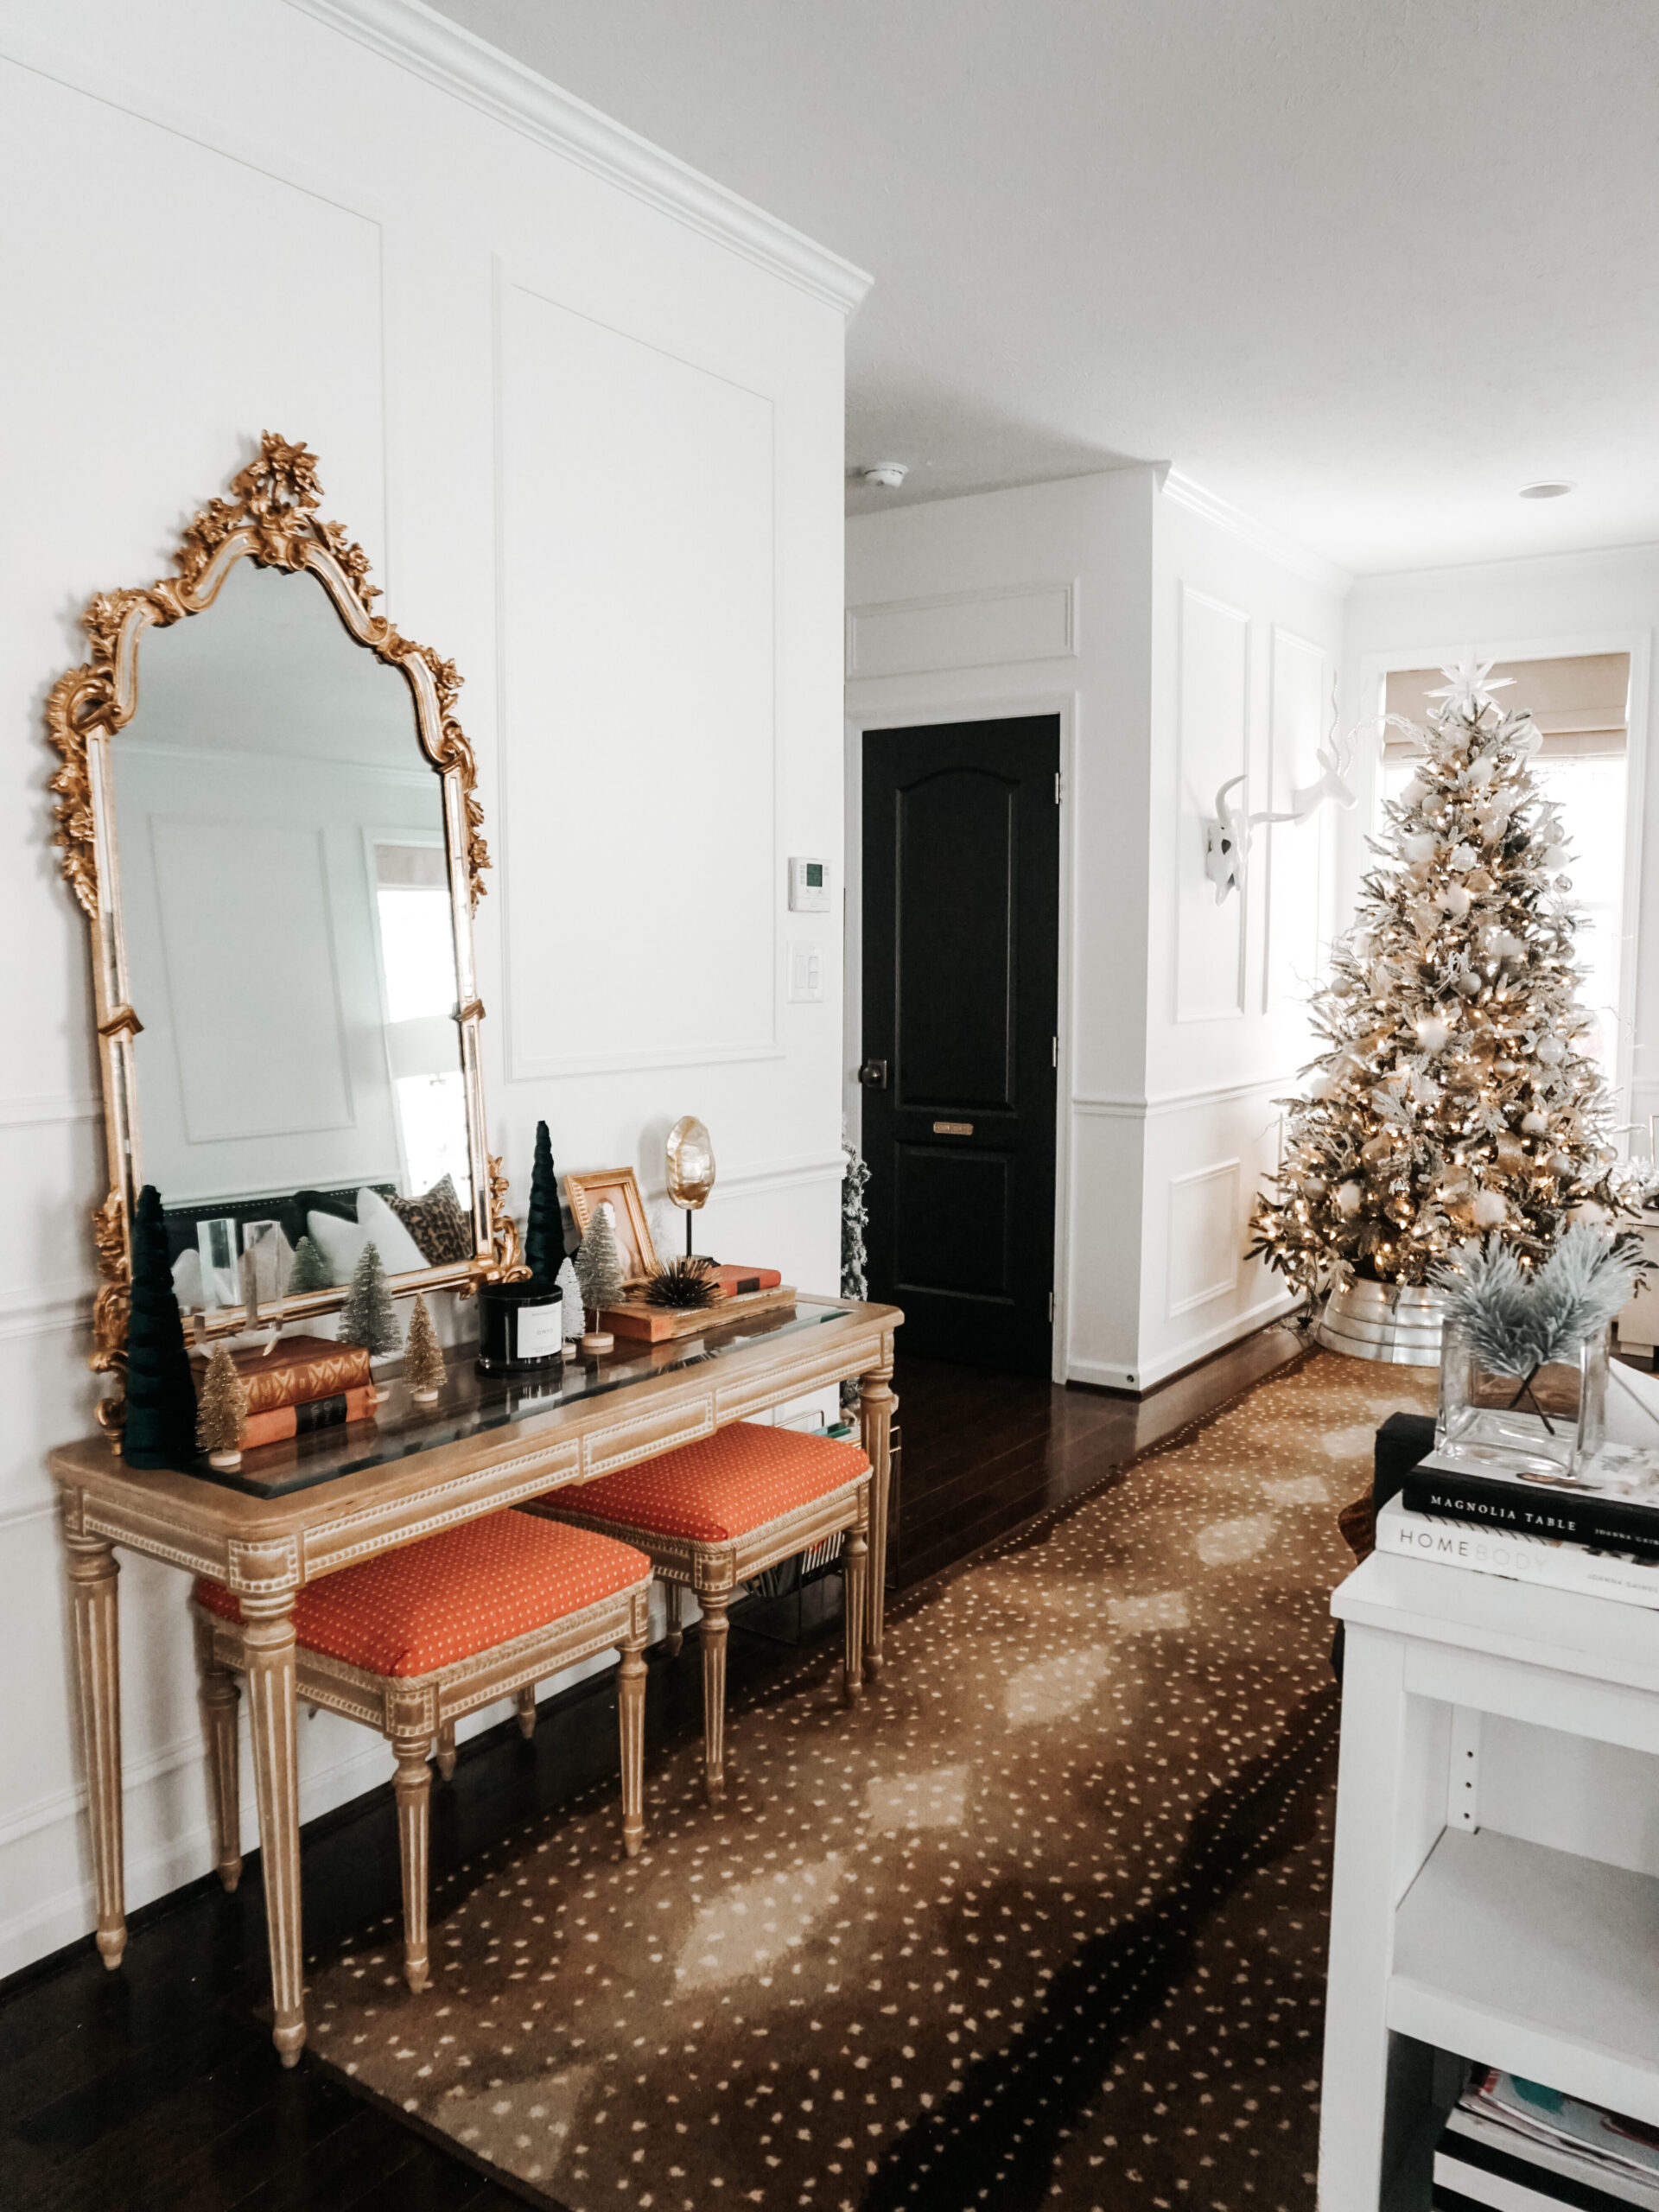

And if you aren’t planning a DIY anytime soon, if nothing else, I hope you enjoyed these after photos and christmas decor!
If you have any questions, you can always comment below for me to answer! I know I didn’t get into some details, but if you need recommendations for youtube tutorials, or other helpful posts, let me know in the comments below!